2. Read the Docs快速入门
2.1. 安装
使用Anaconda配置单独的Python环境(readthedocs为自定义环境名称)。
conda create -n "readthedocs" python=3
进入Python环境(readthedocs为自定义环境名称)。
conda activate readthedocs
安装sphinx(readthedocs为项目名称)。
pip install sphinx
cd readthedocs
sphinx-quickstart

# 语言支持输入zh_CN,详见:
# https://www.sphinx-doc.org/en/master/usage/configuration.html#confval-language
添加.gitignore。
vim .gitignore
/build
使用sphinx_rtd_theme界面优化。
pip install sphinx_rtd_theme
修改 conf.py 配置文件
1 2 3 | import sphinx_rtd_theme html_theme = "sphinx_rtd_theme" html_theme_path = [sphinx_rtd_theme.get_html_theme_path()] |
生成html文件。
make clean
make html
2.2. md文件支持
安装recommonmark。
pip install recommonmark
修改 conf.py 文件。
1 2 3 4 5 | from recommonmark.parser import CommonMarkParser source_parsers = { '.md': CommonMarkParser, } source_suffix = ['.rst', '.md'] |
启用AutoStructify功能。
1 2 3 4 5 6 7 8 9 10 11 | # At top on conf.py (with other import statements) import recommonmark from recommonmark.transform import AutoStructify # At the bottom of conf.py def setup(app): app.add_config_value('recommonmark_config', { 'url_resolver': lambda url: github_doc_root + url, 'auto_toc_tree_section': 'Contents', }, True) app.add_transform(AutoStructify) |
2.3. 配置sphinx-autobuild
在项目目录下执行sphinx-autobuild。
pip install sphinx-autobuild
sphinx-autobuild ./source ./build/html
# sphinx-autobuild ./source ./build/html -H 127.0.0.1 -p 8080
# 自定义ip和端口
2.4. 配置nginx
除了配置sphinx-autobuild,还可以使用nginx启动本地服务。
nginx配置文件路径 conf\nginx.conf 。
2.4.1. 常用命令
start nginx         启动
nginx -s stop       快速停机
nginx -s quit       优雅停机
nginx -s reload     重载配置文件
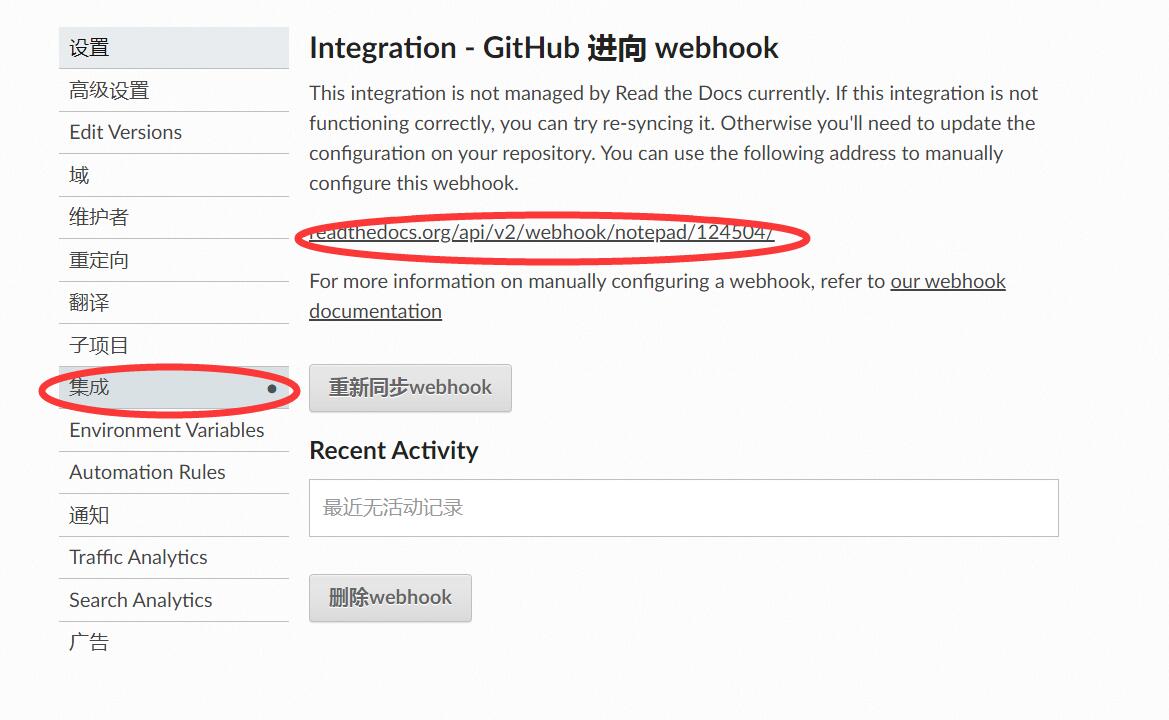
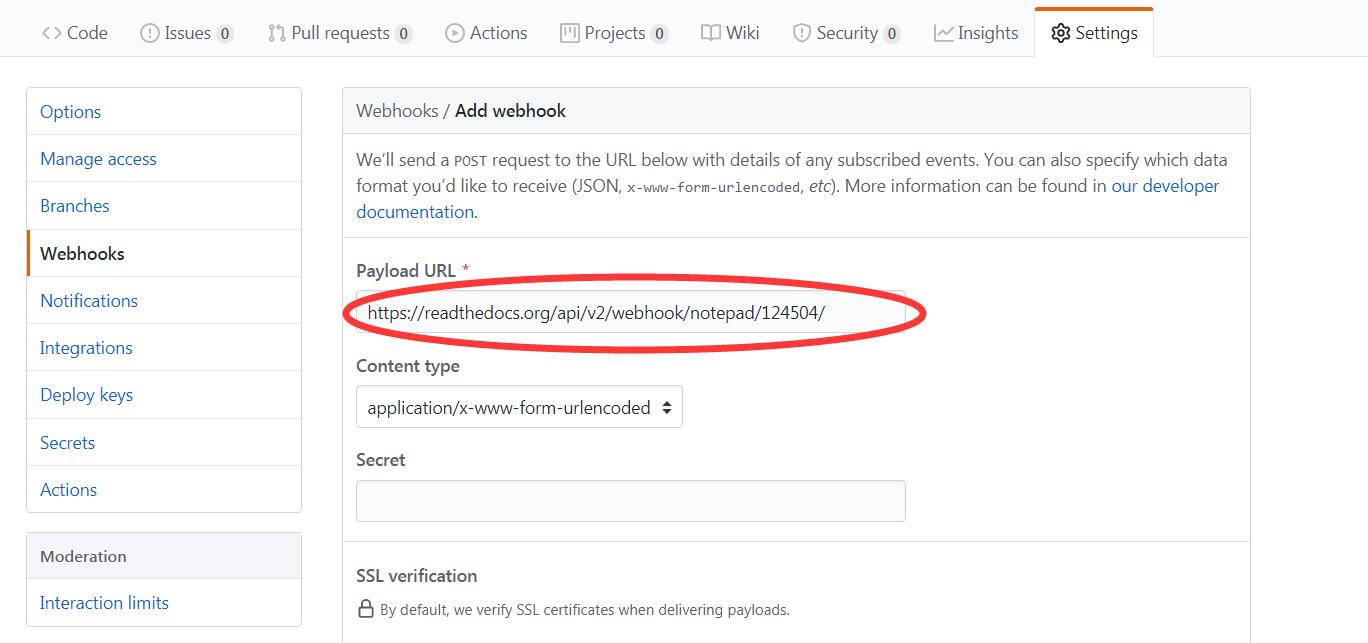
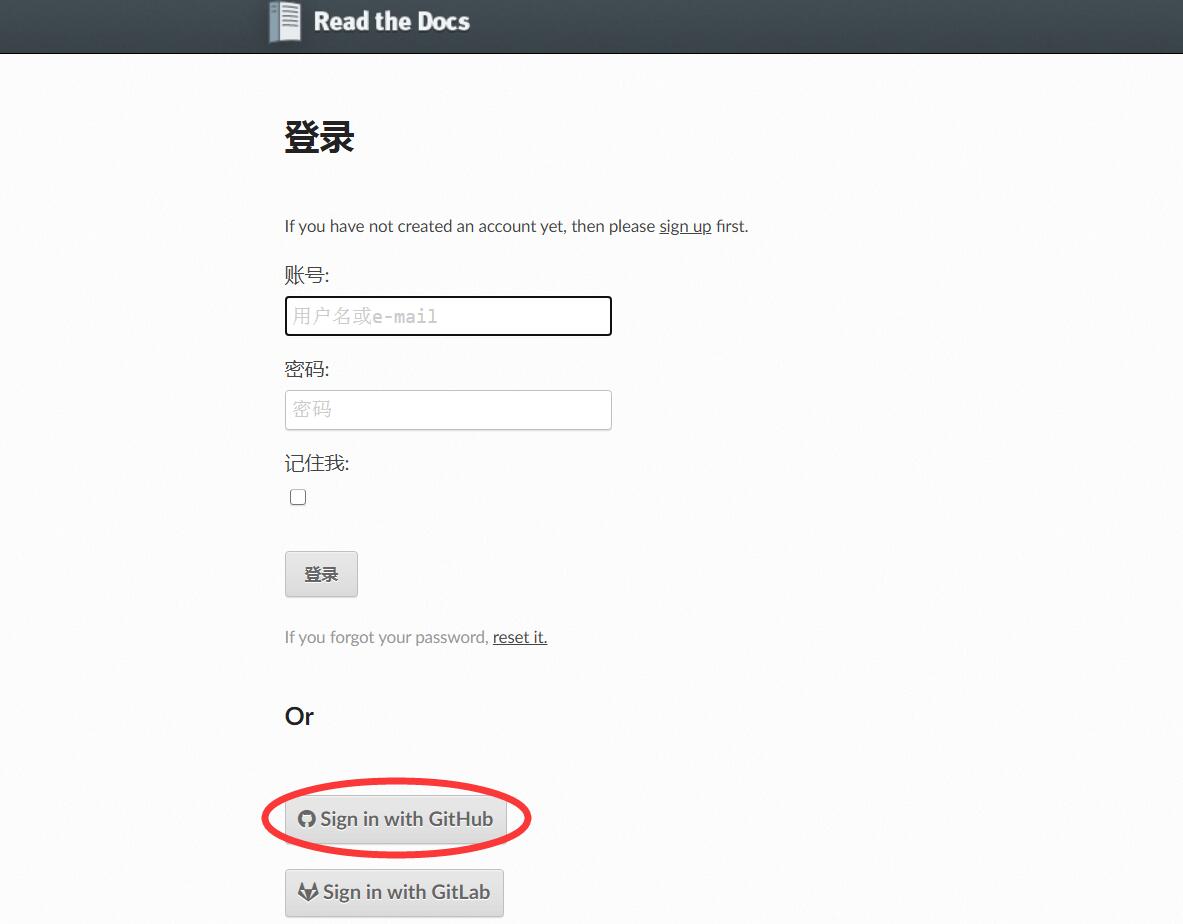
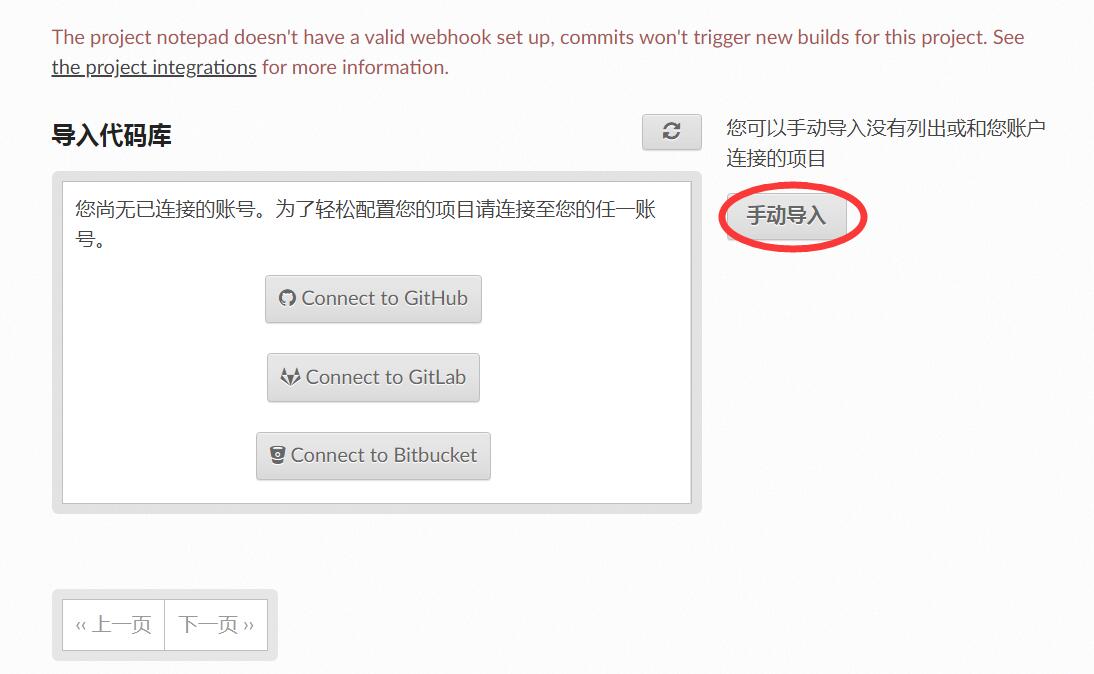
2.5. Read the Docs创建项目
2.5.2. 新建GitHub项目
本地电脑clone GitHub项目。
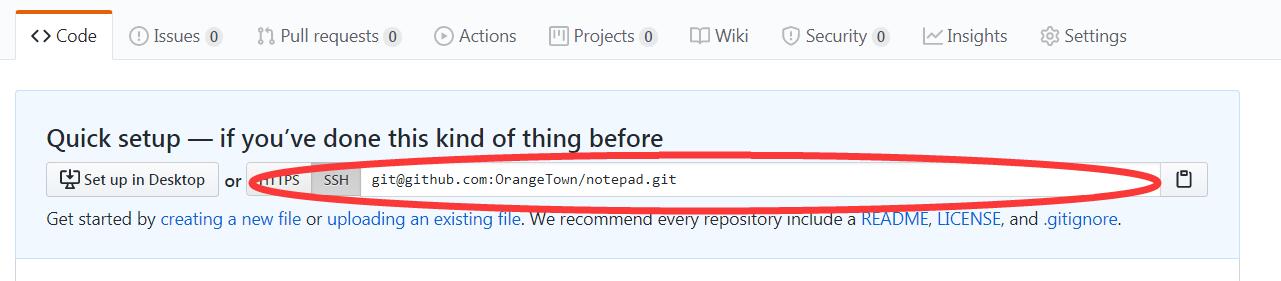
git clone git@github.com:OrangeTown/notepad.git
git add .
git commit -m "init"
git push origin master
2.5.3. 发布到Read the Docs官网
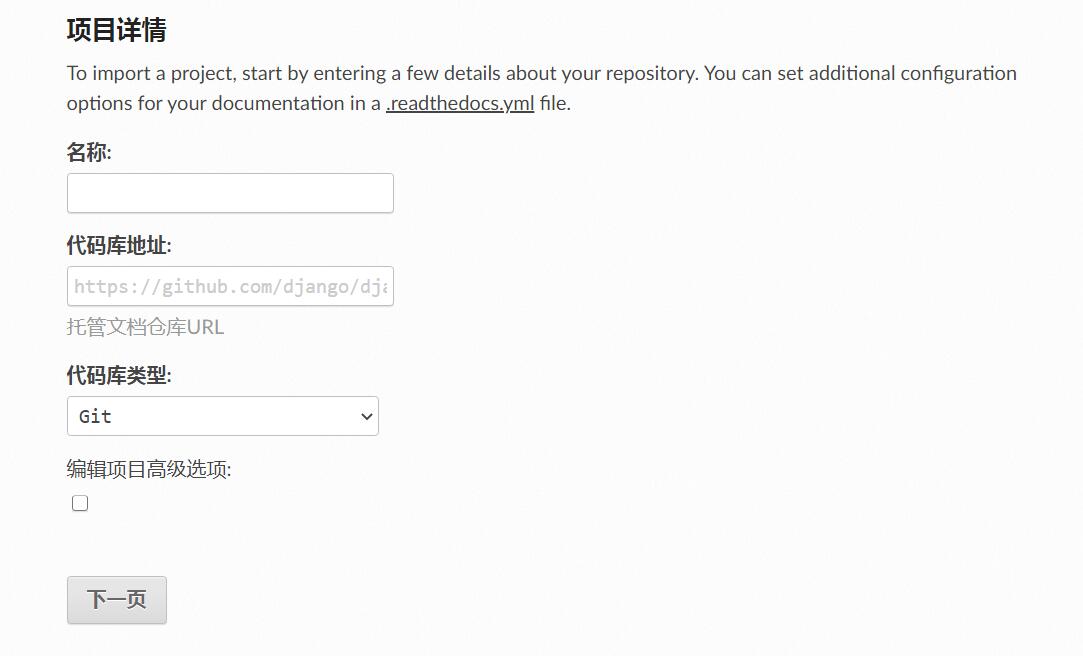
如在编译时遇到以下错误: Sphinx error: master file [..]/checkouts/latest/contents.rst not found ,修复方法是修改sphinx项目的 conf.py 添加以下的一行: master_doc = 'index' 。